Support
Installing OS and Firmware
The OAK-S37 reproduces the ASR-10’s audio, effects, filters and workflow. To do this, it requires the original ASR-10 firmware and OS files, which you must provide. The OAK-S37 does not ship with these files.
Recommended Versions
Firmware: ASR-10 v1.5b
OS: ASR-10 OS v3.53
How Storage Works
Firmware, floppy images, SCSI drives, and CD images are virtual and are stored on the USB thumb drive. You may store as many virtual drives or floppies as will fit.
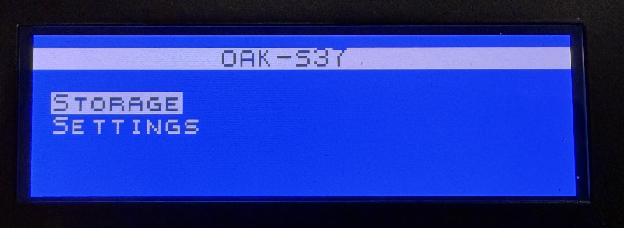
Copying a disk image to the USB does not insert it into the sampler. Press OAK to insert a floppy or attach a virtual SCSI drive or CD.
The sampler only reads virtual media that has been inserted or attached through the OAK menu. Once media is inserted, the rest of the system behaves like the original ASR-10.
Note: only one USB will be read, so use one USB thumb drive at a time.
Installing Firmware
- Obtain the firmware files, see Obtaining Firmware.
- Turn off the OAK-S37 and remove the USB thumb drive from the back.
- Copy both firmware files to the USB drive. Unzip first if it’s zipped.
Example: Your ASR-10 v1.5b firmware zip may contain two files, asr10-lo.bin and asr10-hi.bin or similar. Both files are required (ensure one filename contains lo and the other contains hi).
- Turn on the OAK-S37 and it will boot. (Note: you need to install the OS, next section.)
Installing the OS
You can boot using either an OS floppy image or an existing SCSI hard-drive image.
Install OS From a New Floppy Image
Copy an ASR-10 OS floppy image to the USB thumb drive. Supported format: .img. The image may use any filename.
Example: Ensoniq ASR-10 OS V3.53.img
Do not use CD ISOs to boot.
Insert the USB drive and follow the first-time setup shown on the OAK-S37.
Mac users: if you see “OS Not On Disk” at startup, macOS added a hidden copy of the file with a name starting with a dot. Press OAK, then Storage > Floppy, and select the OS disk without the dot.
Install OS From an Existing ZuluSCSI Image
If you are already using ZuluSCSI on your ASR-10:
- Make sure the image contains a bootable ASR-10 OS.
- Copy the .hda image to the USB thumb drive.
- Attach it to a SCSI slot from the OAK menu.
- Reboot.
The drive should work as it did on your original ASR-10.
Moving the OS From Floppy to SCSI
Booting from a floppy image is slower than booting from a hard drive and requires extra steps when saving files, so it’s recommended to boot from a virtual hard drive.
After the first successful floppy boot:
- Press OAK and create a new hard drive.
- Attach it to a SCSI slot.
- Reboot. The sampler should still boot from floppy.
- Select COMMAND > SELECT STORAGE DEVICE.
- Select the new SCSI drive and press OK.
- Select COMMAND > FORMAT SCSI DEVICE (if the option is not shown: Settings > Reboot).
- Select Yes when asked to copy the OS.
- When complete, remove the floppy from the OAK menu and reboot.
The sampler should now boot from the SCSI drive.
A Note on SCSI
The ASR-10 boots in this order: Floppy, SCSI 7, 6, 5, 4, 2, 1. If, for example, you leave a non-bootable virtual floppy “inserted”, the OS will say no OS found and then attempt to boot from SCSI.
Inserting a Virtual Floppy
- Press OAK.
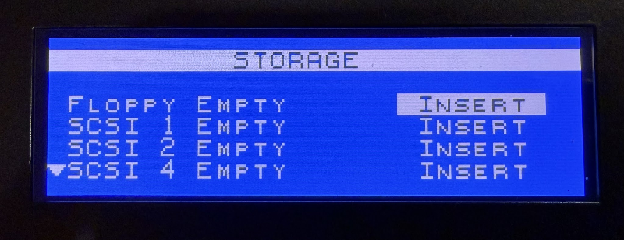
- Select Floppy > Insert.
- Choose the floppy file on the USB you want to use.
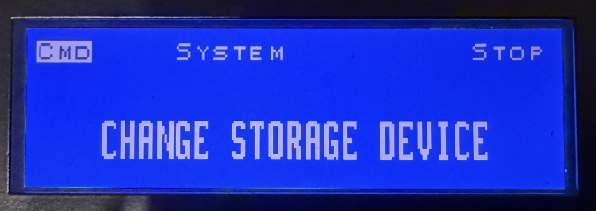
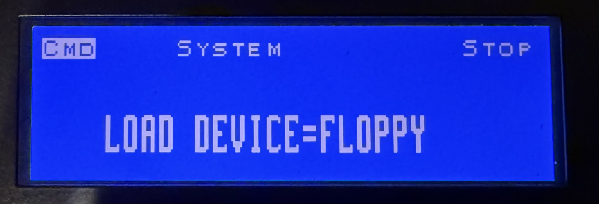
Return to the sampler and select COMMAND > CHANGE STORAGE DEVICE. Select FLOPPY and press OK.
The sampler can now read the disk.
Using a Physical Floppy
A physical floppy must first be converted to an image using a computer and a Greaseweazle floppy drive.
Typical commands:
gw info
gw read --format=ensoniq.800 MYDISK.img
Copy the resulting image to the USB thumb drive and insert it through the OAK menu.
Using a Physical CD
Use a computer CD or DVD drive and a disc-imaging tool to create an .iso file. Copy the ISO to the USB thumb drive and attach it through the OAK menu.
Obtaining Firmware
Recommended firmware version: ASR-10 v1.5b
Option 1: Working or Nonworking ASR-10
There are two firmware ROM chips to read. This requires opening the ASR-10. The firmware can often still be read from a nonworking ASR-10 using a T48 programmer. Back up chips Lower (U19) and Upper (U22), using the 27C010 chip profile. Have an electronics technician do this if you are not comfortable working inside the unit.
Option 2: Firmware Backup
You can also use an existing backup or zip file of your ASR-10 firmware. Both the hi and lo files are required.
Using The OAK Sampler
The OAK behaves like the ASR-10, so ASR-10 tutorials apply. Below are great non-affiliated starting resources:
- Tone Lab How to use the Ensoniq ASR-10 Sampler: Meet the ASR
- The Daydream Sound Ensoniq ASR-10 Beginners Manual
- Ensoniq ASR-10 Tutorial